Saturday, May 18, 2024

Written Pattern for Set of 2 Easy Scrubby Crochet Dishcloths for every Kitchen and video tutorial

 Crafting Connection: Exploring the Art of Crochet Dishcloths for Sustainable Living


These dishcloths offer a delightful texture and an enhanced scrubbing capability, rendering them ideal as both gifts and decorative elements in any household. All that's required to start this project is worsted weight yarn and a 5 mm crochet hook. This tutorial serves as an excellent resource for novices looking to explore simple and beginner-friendly crochet dishcloth patterns. The intricate yet manageable design ensures that crafting these dishcloths is a quick and enjoyable endeavor, particularly for those who relish do-it-yourself projects.

The beauty of these dishcloths lies not only in their functionality but also in their versatility. Beyond their primary purpose in the kitchen, they can also be used in bathrooms for gentle exfoliation or even as coasters to protect surfaces from hot pots and pans. Their soft yet sturdy texture makes them suitable for various household tasks, adding both practicality and charm to any space

Moreover, the choice of materials is not only about functionality but also about sustainability. By opting for cotton yarn, crafters contribute to eco-friendly practices, reducing their environmental footprint while indulging in creative pursuits. This eco-conscious approach aligns with a growing trend towards mindful consumption and responsible living.

What truly sets these dishcloths apart is the personal touch they carry. Handcrafted with care and attention to detail, each piece is a labor of love, infused with the maker's creativity and craftsmanship. As such, they hold a unique value beyond their practical utility, becoming cherished keepsakes and meaningful gifts for friends and family.


In essence, these dishcloths represent more than just household accessories; they embody a sense of community, creativity, and sustainability. With each stitch, crafters contribute to a culture of handmade craftsmanship and environmental stewardship, transforming ordinary materials into extraordinary works of art. So, gather your yarn, pick up your hook, and embark on a journey of creativity and connection through the timeless art of crochet.


Green Dishcloth

chain 42

R1: Double crochet into the 4th chain, double crochet, chain 1, repeat (skip chain, double crochet, double crochet, chain 1) repeat till the last 4 chains, skip chain, 3 double crochets.

R2: chain 1, 3 single crochets, extended double crochet, (repeat (2 single crochets, front post extended double crochet)), 3 double crochets

R3: chain 3, 2 double crochets, chain 1, Repeat ( skip a stitch, 2 double crochets), skip stitch, 3 double crochets

R4: chain1, 3 single crochets, front post extended double crochet, repeat (2 single crochets,1front post extended double crochet ), 3 single crochets

R5: chain 3, 2 double crochets, chain 1, Repeat ( skip the front post extended double crochet, 2 double crochets), skip the front post extended double crochet, 3 double crochets

Repeat for total of 26 rows or the desired length.

No edge needed, I think the dishcloths look more modern without a crocheted edge.


Pink Dishcloth:
V stitch= double crochet, chain 1, double crochet in the same stitch or space

Chain 41

R1: double crochet into the 4th chain, skip chain, V stitch, (repeat ( skip chain, double crochet, skip chain, V stitch)), skip chain, 2 double crochets.

R2: chain 3, front post double crochet, repeat (V stitch, front post double crochet), double crochet into the last stitch

R3: chain 3, back post double crochet, repeat (V stitch, back post double crochet), double crochet into the last stitch

Repeat for as many rows you need to match the length of your green dishcloth.


Happy crocheting!


Tuesday, May 7, 2024

How to Add Zipper and Fabric Lining Explained with Photos and Video Tutorial for Crochet Fanny Pack with Zipper Lining


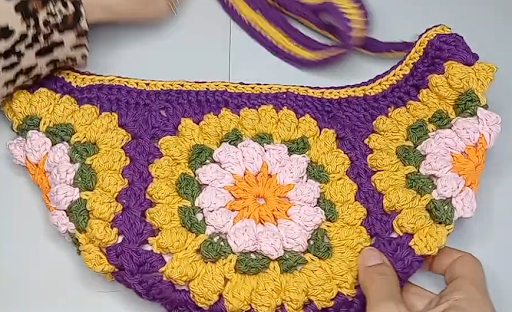
Learn how to elevate your crochet fanny pack game with this comprehensive tutorial on adding a fabric lining and zipper. Whether you're a seasoned crocheter looking to take your creations to the next level or a beginner eager to learn new techniques, this step-by-step guide has you covered. Discover how to seamlessly integrate a fabric lining into your crochet fanny pack, providing both functionality and style. Follow along as we demonstrate how to insert a zipper, transforming your handmade accessory into a practical and chic storage solution. With clear instructions and helpful tips, you'll master the art of lining crochet fanny packs in no time, creating personalized pieces that are as functional as they are fashionable. Say goodbye to loose items and hello to organized storage with this DIY project that combines the charm of crochet with the practicality of a fabric lining and zipper closure.


 Let's dive in!


Step 1: Prepare the Materials: Zipper, fabric, Sewing Needle and thread or a Sewing machine, Scissors, Pen

First off, ensure you have your zipper ready. It doesn't need to span the entire length, as it only requires enough to open partway. Measure the appropriate length for your bag, keeping in mind the size of your fanny pack.


Step 2: Trace the Lining

Place your bag on the lining fabric and use a pencil to trace around it, leaving about half an inch for sewing allowance. Be mindful of any adjustments needed for size differences between your bag and the traced outline.


Step 3: Fold and Cut

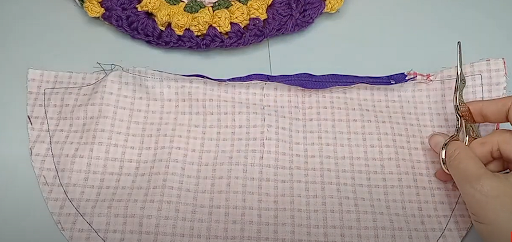
Fold the lining fabric in half, ensuring symmetry, and cut along the traced outline, starting from one corner to the other. This will create two identical halves for your lining.


Step 4: Secure the Sides

Fold each half of the lining from the cut towards the middle, ensuring symmetry. Use a pencil or pin to trace along half of the previously traced line, ensuring accuracy and consistency between both halves.


Step 5: Centering the Zipper

Fold your lining in half to find the center point. Mark this point with a pin or pencil. Similarly, mark the center points on both ends of your zipper. Align the center points of the lining and the zipper, ensuring they match up.


Step 6: Pinning the Zipper

With the zipper facing downwards, align the center points of the zipper with those of the lining. Pin them together along the edges to secure them in place.


Step 7: Sewing the Zipper

Using a needle and thread or a sewing machine, stitch the zipper to the lining along the pinned edges. Ensure that the zipper is securely attached, and the stitches are neat and tidy.


Step 8: Sewing 

-by Hand

Thread your needle with and make a knot at the end. Beginning about a quarter of an inch from the edge, start sewing along the traced line using backstitches. Repeat this process until you've sewn around the entire outline.


-with a Machine

Alternatively, if you have access to a sewing machine, you can use it for quicker and more precise stitching. Follow the traced lines, ensuring to maintain consistent seam allowances.


Step 9: Finishing Touches

Once the zipper is attached, fold the lining back into shape, ensuring the zipper operates smoothly. Trim any excess threads, and your lining is now ready to be inserted into the fanny pack.


Step 10: Final Adjustments

Check the fit of the lining within the fanny pack, ensuring it sits neatly and doesn't obstruct the zipper. Make any necessary adjustments or trimmings to achieve the desired fit.


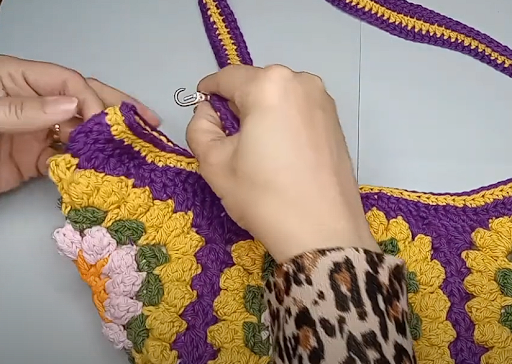
Step 11: Securing the Strap

If desired, you can now attach a strap to your fanny pack for easy carrying. This can be done using fabric scraps or purchased straps, depending on your preference.


And there you have it! With the lining sewn and attached, your fanny pack is now complete and ready for use. Feel free to experiment with different fabrics and designs to personalize your creation further. Thanks for watching, and happy crafting!