How to Crochet Snake | Free Written Pattern for Adventurous Beginners
----------------------------
Crochet without distractions—no ads, no hassle. If you’ve enjoyed free, ad-free patterns, now’s your chance to support what you love!
By purchasing The Crochet Journal, you’re helping keep patterns ad-free and accessible for everyone. Plus, you’ll get a beautifully designed tool to organize all your projects and ideas.
Your support means the crochet community stays creative, connected, and ad-free! https://www.amazon.com/dp/B0DJS619Q1
------------------------------
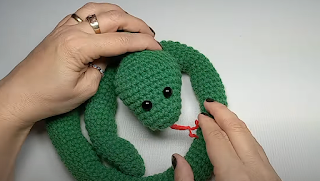
Learn how to crochet a cute amigurumi snake with our easy guide! Follow along with the free written patter step by step to make your own plush snake toy. We'll show you all the crochet moves you need to know, from starting with yarn to making the snake's body. Have fun making your own snake friend!
Crafting Your Own Adorable Amigurumi Snake: A Crochet AdventureCrocheting holds a special place in the hearts of many crafters, offering a creative outlet that allows for the transformation of yarn into charming creations. Among the various crochet projects, amigurumi stands out for its whimsical and cuddly appeal. If you're eager to embark on a crocheting journey that promises both fun and fulfillment, consider crafting your very own amigurumi snake. With our guide, you'll learn the essential techniques needed to bring your plush snake toy to life.
Before diving into the crocheting process, it's essential to gather all the necessary supplies. Start with a soft and vibrant yarn, selecting colors that resonate with the personality of your snake. Consider earthy greens for a natural look or bold hues for a playful twist.
Pair your yarn with a crochet hook of the appropriate size to ensure smooth and comfortable stitching. You'll also need stuffing material, such as fiberfill or yarn scraps, to give your snake a texture. Don't forget a yarn needle for weaving in ends and adding any embellishments, along with scissors for cutting yarn and trimming excess threads.
If you desire a lifelike touch, consider adding safety eyes to your snake's head or embroidering eyes using yarn.
With your supplies ready, it's time to begin the crocheting process. Start by forming the foundation of your snake using the magic ring technique. The magic ring creates a tight and seamless center, preventing stuffing from escaping and ensuring a polished finish. As you crochet the head of your snake, use single crochet stitches worked in the round to shape its contours. Pay attention to any increases or decreases needed to achieve the desired size and shape. If you want to add personality to your snake, consider incorporating stripes, spots, or other embellishments using surface crochet, embroidery, or appliqué techniques.
Transitioning from the head to the body, continue crocheting in the round to form the length of your snake. Experiment with color changes or decorative stitches to customize its appearance, allowing your creativity to shine. Periodically add stuffing as you work to give the body softness and plumpness. As you approach the end of the body, begin tapering the tail by decreasing stitches to create a tapered effect. Follow your pattern's instructions to maintain symmetry and balance, ensuring a smooth transition from body to tail.
Once the tail is complete, fasten off the yarn with a slip stitch and weave in any remaining ends using a yarn needle. Conceal the yarn tails within the body of the snake for a polished finish. As you admire your completed amigurumi snake, take pride in the craftsmanship and attention to detail that went into its creation. Whether displayed proudly in your home or given as a thoughtful gift, your snake companion is sure to bring joy and warmth wherever it goes.
In conclusion, crocheting an amigurumi snake is a delightful journey filled with creativity and craftsmanship. With our guide, you've learned the essential techniques needed to bring your plush snake toy to life. So gather your supplies, unleash your imagination, and let the stitches weave together to form a charming snake companion that's uniquely yours. Happy crocheting!
Now that you know how to make the head of the snake you can crochet a dragon because it uses exactly the same pattern and here you can find that pattern too.
Feeling Generous and want to say thank you for the pattern? Donation Jar: https://ko-fi.com/myyarnloft
Stitches:
mr-magic ring
x-single crochet
v-increase (two single crochets in one stitch)
(number)- the final number of stitches in a row
A-decrease (crochet two single crochets through the front loops together)
_*...* repeat the instructions between the stars that many times the number before the stars shows
Are you loving all the free crochet patterns and tutorials you’ve enjoyed? 💖 Why not give a little back? When you purchase The Crochet Journal today, you’re not just treating yourself to the perfect tool to organize your projects—you’re helping to support more free patterns and tutorials for the crochet community.
🌟Don’t miss this chance to support what you love and level up your crochet game! https://www.amazon.com/dp/B0DJS619Q1
👉TIMESTAMPS and 👉FREE Written Pattern:
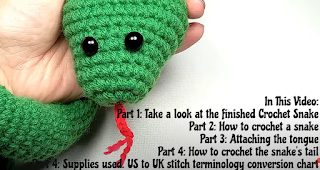
0:00 how to crochet a snake 0:22 how to crochet a snake Row 1: mr,6x (6) 0:46 how to crochet a snake Row 2: v (12) 1:06 how to crochet a snake's tongue 1:10 how to secure the magic ring 2:20 how to crochet a snake Row 3: v,x,v (18) 2:27 how to crochet a snake Rows 4 ,5 3:02 how to crochet a snake Row 6: 3*(5x, v) (21) 3:20 how to crochet a snake Row 7: 3v,7x,3v,8x (27) 3:48 how to crochet a snake Row 8: 3*(xv), 7x, 3*(xv),8x (33) 4:51 how to crochet a snake Row 9, 10, 11 (33x) 5:09 how to crochet a snake Row 12: 7x, A, 5x, A, 15x,A (30) 6:02 how to crochet a snake Row 13: A,3x, repeat 6 times (24) 6:33 put the eyes and start stuffing the snake 7:09 how to crochet a snake Row 14: 2x, A repeat 6 times (18) 7:31 how to crochet a snake Row 15:4x, A repeat 3 times (15) 7:40 how to crochet a snake's body: keep crocheting the rest of the body 8:00 how to crochet a snake's tail 8:13 how to crochet a snake's tail decrease to 12 stitches (3x,A)*3 8:30 how to crochet a snake's tail decrease to 9 stitches (2x,A)*3 8:40 how to crochet a snake's tail decrease to 6 stitches (x,A)*3 8:57 how to crochet a snake's tail's end 9:60 What supplies were used to crochet a snake. What Yarn and hooks used to crochet the snake
Crochet without distractions—no ads, no hassle. If you’ve enjoyed free, ad-free patterns, now’s your chance to support what you love!
By purchasing The Crochet Journal, you’re helping keep patterns ad-free and accessible for everyone. Plus, you’ll get a beautifully designed tool to organize all your projects and ideas.
Your support means the crochet community stays creative, connected, and ad-free! https://www.amazon.com/dp/B0DJS619Q1
📔 Buy your Crochet Journal today and make a difference in every stitch.


What is the stitches in english
ReplyDeleteI will add them here too. Because it was explained in the video I thought everyone will know them. Thank you for pointing it out.
DeleteIt says how to crochet asnakes body, but there are no stitches to do, i am so confused
ReplyDeletekeep crocheting the same 15 stitches, after the head, that many rows, you want your snake to be long. you decide the length of the body.
ReplyDeleteI'm confused, where is the pattern?
ReplyDeleteSuper cute. How much yarn did you use?
ReplyDeleteWhat mm size eyes do you recommend?
ReplyDelete