Saturday, May 18, 2024

Written Pattern for Set of 2 Easy Scrubby Crochet Dishcloths for every Kitchen and video tutorial

 Crafting Connection: Exploring the Art of Crochet Dishcloths for Sustainable Living


These dishcloths offer a delightful texture and an enhanced scrubbing capability, rendering them ideal as both gifts and decorative elements in any household. All that's required to start this project is worsted weight yarn and a 5 mm crochet hook. This tutorial serves as an excellent resource for novices looking to explore simple and beginner-friendly crochet dishcloth patterns. The intricate yet manageable design ensures that crafting these dishcloths is a quick and enjoyable endeavor, particularly for those who relish do-it-yourself projects.

The beauty of these dishcloths lies not only in their functionality but also in their versatility. Beyond their primary purpose in the kitchen, they can also be used in bathrooms for gentle exfoliation or even as coasters to protect surfaces from hot pots and pans. Their soft yet sturdy texture makes them suitable for various household tasks, adding both practicality and charm to any space

Moreover, the choice of materials is not only about functionality but also about sustainability. By opting for cotton yarn, crafters contribute to eco-friendly practices, reducing their environmental footprint while indulging in creative pursuits. This eco-conscious approach aligns with a growing trend towards mindful consumption and responsible living.

What truly sets these dishcloths apart is the personal touch they carry. Handcrafted with care and attention to detail, each piece is a labor of love, infused with the maker's creativity and craftsmanship. As such, they hold a unique value beyond their practical utility, becoming cherished keepsakes and meaningful gifts for friends and family.


In essence, these dishcloths represent more than just household accessories; they embody a sense of community, creativity, and sustainability. With each stitch, crafters contribute to a culture of handmade craftsmanship and environmental stewardship, transforming ordinary materials into extraordinary works of art. So, gather your yarn, pick up your hook, and embark on a journey of creativity and connection through the timeless art of crochet.


Green Dishcloth

chain 42

R1: Double crochet into the 4th chain, double crochet, chain 1, repeat (skip chain, double crochet, double crochet, chain 1) repeat till the last 4 chains, skip chain, 3 double crochets.

R2: chain 1, 3 single crochets, extended double crochet, (repeat (2 single crochets, front post extended double crochet)), 3 double crochets

R3: chain 3, 2 double crochets, chain 1, Repeat ( skip a stitch, 2 double crochets), skip stitch, 3 double crochets

R4: chain1, 3 single crochets, front post extended double crochet, repeat (2 single crochets,1front post extended double crochet ), 3 single crochets

R5: chain 3, 2 double crochets, chain 1, Repeat ( skip the front post extended double crochet, 2 double crochets), skip the front post extended double crochet, 3 double crochets

Repeat for total of 26 rows or the desired length.

No edge needed, I think the dishcloths look more modern without a crocheted edge.


Pink Dishcloth:
V stitch= double crochet, chain 1, double crochet in the same stitch or space

Chain 41

R1: double crochet into the 4th chain, skip chain, V stitch, (repeat ( skip chain, double crochet, skip chain, V stitch)), skip chain, 2 double crochets.

R2: chain 3, front post double crochet, repeat (V stitch, front post double crochet), double crochet into the last stitch

R3: chain 3, back post double crochet, repeat (V stitch, back post double crochet), double crochet into the last stitch

Repeat for as many rows you need to match the length of your green dishcloth.


Happy crocheting!


Tuesday, May 7, 2024

How to Add Zipper and Fabric Lining Explained with Photos and Video Tutorial for Crochet Fanny Pack with Zipper Lining


Learn how to elevate your crochet fanny pack game with this comprehensive tutorial on adding a fabric lining and zipper. Whether you're a seasoned crocheter looking to take your creations to the next level or a beginner eager to learn new techniques, this step-by-step guide has you covered. Discover how to seamlessly integrate a fabric lining into your crochet fanny pack, providing both functionality and style. Follow along as we demonstrate how to insert a zipper, transforming your handmade accessory into a practical and chic storage solution. With clear instructions and helpful tips, you'll master the art of lining crochet fanny packs in no time, creating personalized pieces that are as functional as they are fashionable. Say goodbye to loose items and hello to organized storage with this DIY project that combines the charm of crochet with the practicality of a fabric lining and zipper closure.


 Let's dive in!


Step 1: Prepare the Materials: Zipper, fabric, Sewing Needle and thread or a Sewing machine, Scissors, Pen

First off, ensure you have your zipper ready. It doesn't need to span the entire length, as it only requires enough to open partway. Measure the appropriate length for your bag, keeping in mind the size of your fanny pack.


Step 2: Trace the Lining

Place your bag on the lining fabric and use a pencil to trace around it, leaving about half an inch for sewing allowance. Be mindful of any adjustments needed for size differences between your bag and the traced outline.


Step 3: Fold and Cut

Fold the lining fabric in half, ensuring symmetry, and cut along the traced outline, starting from one corner to the other. This will create two identical halves for your lining.


Step 4: Secure the Sides

Fold each half of the lining from the cut towards the middle, ensuring symmetry. Use a pencil or pin to trace along half of the previously traced line, ensuring accuracy and consistency between both halves.


Step 5: Centering the Zipper

Fold your lining in half to find the center point. Mark this point with a pin or pencil. Similarly, mark the center points on both ends of your zipper. Align the center points of the lining and the zipper, ensuring they match up.


Step 6: Pinning the Zipper

With the zipper facing downwards, align the center points of the zipper with those of the lining. Pin them together along the edges to secure them in place.


Step 7: Sewing the Zipper

Using a needle and thread or a sewing machine, stitch the zipper to the lining along the pinned edges. Ensure that the zipper is securely attached, and the stitches are neat and tidy.


Step 8: Sewing 

-by Hand

Thread your needle with and make a knot at the end. Beginning about a quarter of an inch from the edge, start sewing along the traced line using backstitches. Repeat this process until you've sewn around the entire outline.


-with a Machine

Alternatively, if you have access to a sewing machine, you can use it for quicker and more precise stitching. Follow the traced lines, ensuring to maintain consistent seam allowances.


Step 9: Finishing Touches

Once the zipper is attached, fold the lining back into shape, ensuring the zipper operates smoothly. Trim any excess threads, and your lining is now ready to be inserted into the fanny pack.


Step 10: Final Adjustments

Check the fit of the lining within the fanny pack, ensuring it sits neatly and doesn't obstruct the zipper. Make any necessary adjustments or trimmings to achieve the desired fit.


Step 11: Securing the Strap

If desired, you can now attach a strap to your fanny pack for easy carrying. This can be done using fabric scraps or purchased straps, depending on your preference.


And there you have it! With the lining sewn and attached, your fanny pack is now complete and ready for use. Feel free to experiment with different fabrics and designs to personalize your creation further. Thanks for watching, and happy crafting!


Written Pattern for Crochet a Yip Yip Aliens and Video Tutorial


 Embark on a whimsical crochet journey as you bring to life the iconic Yip Yip Aliens through the art of crochet. This extensive tutorial offers a comprehensive guide, complete with detailed instructions and a written pattern, suitable for crocheters of all levels. Whether you're a novice eager to learn the fundamentals or a seasoned crafter seeking a new challenge, this tutorial provides a roadmap for every step of the process. From selecting the perfect yarn hues to mastering intricate stitches, you'll gain valuable insights and techniques along the way.

At the core of this tutorial lies the sheer delight of crafting these beloved characters with your own hands. The Yip Yip Aliens, renowned for their eccentric appearance and inquisitive demeanor, have captivated hearts across generations. With this crochet tutorial, you'll have the opportunity to fashion your own personalized renditions of these endearing beings. Whether you opt for a faithful replication or infuse your unique flair, the creative possibilities abound.


The journey commences with gathering essential materials, including yarn in various shades, crochet hooks, and any desired embellishments. Choosing the right yarn hues is pivotal to capturing the essence of the Yip Yip Aliens, encouraging exploration of diverse combinations and options. Once armed with the necessary supplies, you're ready to delve into the enchanting realm of crochet and commence materializing your vision.

The accompanying written pattern serves as your guiding compass, navigating you through each stage of the crochet odyssey. From crafting fundamental shapes to adding intricate details, each step is meticulously elucidated, accompanied by illustrations and photographs. Whether you prefer following written instructions or learning visually via video tutorials, this tutorial caters to diverse learning preferences.


As you diligently work through the pattern, you'll witness the gradual emergence of your Yip Yip Aliens, inching closer to fruition with every stitch and row. Each stitch contributes to their evolving form, fostering anticipation for the eventual unveiling. Throughout the journey, should you encounter hurdles or queries, fear not – this tutorial is tailored to provide unwavering support at every turn. Troubleshooting tips and solutions are proffered to aid in surmounting challenges and achieving optimal outcomes.

Among the most gratifying aspects of crochet lies the profound sense of accomplishment that accompanies completing a project. As you finalize each Yip Yip Alien, a surge of pride washes over you, recognizing that you've birthed something truly extraordinary and singular. Whether destined for display as decorative pieces or bestowed upon loved ones as cherished gifts, they promise to evoke joy and wonder.

Yet, the adventure persists as you venture forth to crochet a functional and distinctive accessory: a Dungeons and Dragons dice bag inspired by the whimsy of Yip Yip Aliens. This practical item marries utility with whimsy, rendering it the perfect accompaniment for your gaming endeavors. Compact in size and resilient in construction, it serves as an ideal vessel for housing dice and other gaming essentials.

The crochet pattern for the dice bag builds upon the skills honed while fashioning the Yip Yip Aliens, introducing fresh techniques and challenges. From working in the round to sculpting the bag and bestowing finishing touches, each stitch expands your crochet repertoire. And akin to the Yip Yip Aliens, the written pattern furnishes detailed instructions and invaluable tips to shepherd you through the process.

As you crochet the dice bag, you're afforded the opportunity to infuse it with your distinctive style and preferences. Opt for yarn hues that reflect your favored D&D character or theme, or embellish it with buttons, beads, or embroidery for a personalized touch. The realm of possibilities stretches as far as your imagination allows, beckoning you to explore and customize.

Upon completion, your dice bag stands as a testament to your craftsmanship and ardor for gaming. Whether rolling dice within the confines of your abode or confronting adversaries at a convention, your handmade bag will evoke admiration from fellow adventurers. And as you continue your crochet voyage, you'll carry with you the memories of the Yip Yip Aliens and the proficiencies acquired throughout the odyssey.

In summation, this tutorial offers a comprehensive and delightful means of learning crochet while crafting two distinctive and memorable projects. Whether you're a neophyte or a seasoned hand, there's something within these pages to ignite your creativity and passion. So, grasp your crochet hook and yarn, and set forth on an adventure brimming with whimsy and imagination

Written Pattern: ow 1 12 double crochet (dc) Row 2 increase (24dc) Row 3, inc, 1dc (36) Row 4-5-6-7-8 (36dc) Row 9 ch2,1dc, 3dctog, 7dc, 3dctog, 7dc, 3dctog, 2dc (27) Row 10 ch2, 1dc, 3dctog, 4dc, 3dctog, 4dc, 3dctog, 2dc (21) Row 11 ch2, 1dc, 3dctog, 1dc, 3dctog, 1dc, 3dctog, 2dc (15) Row 12 ch2,2dctog, 3dctog, 3dctog (9) eyes Row 1 magic ring, 5sc Row 2 increase (10) Row 1 10sc


add fringe


Friday, May 3, 2024

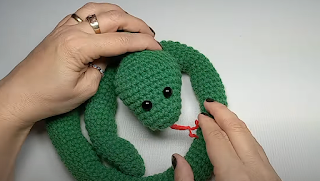
Worry Worms Fidget Written pattern and Video Tutorial

Worry Worms Fidget Written pattern and Video Tutorial


Crafting a crochet googly eye worry worm is a delightful and therapeutic journey that offers a creative outlet for stress relief and relaxation. In this comprehensive guide, we'll explore the process of creating charming worry worms adorned with googly eyes, transforming them into whimsical fidget keychains that provide comfort and entertainment on the go. Crochet has long been celebrated for its meditative qualities, offering practitioners a soothing and rhythmic activity that promotes mindfulness and tranquility. By engaging in the repetitive motion of crochet stitches, individuals can find a sense of calm and focus amidst the chaos of daily life. Adding googly eyes to these worry worms elevates them to playful companions that bring joy and whimsy to any situation.

To embark on your crochet googly eye worry worm journey, gather your materials: yarn in your preferred colors, a crochet hook, stuffing for the worms, and, of course, googly eyes. Select yarn colors that resonate with your mood and personality, whether you're drawn to calming pastels or vibrant hues that spark joy. Experiment with different color combinations to create worry worms that reflect your unique style and aesthetic preferences.


With your crochet googly eye worry worms complete, transform them into fidget keychains by attaching a keyring or loop of yarn to the top of each worm. This allows you to easily hang them from your bag, keys, or backpack, ensuring that they're always on hand whenever you need a moment of comfort or distraction. Whether you're waiting in line, sitting in traffic, or feeling overwhelmed by stress, reach for your worry worm fidget keychain and let its cheerful presence and playful antics help you find peace and relaxation in any situation.

In conclusion, crocheting googly eye worry worms is a delightful and therapeutic activity that offers a creative way to alleviate stress and anxiety. These whimsical creations serve as both charming companions and practical fidget keychains, providing comfort and entertainment whenever you need it most. So gather your materials, embrace your creativity, and embark on a crafting adventure that's sure to bring joy and relaxation into your life.

Playing with worry worms offers numerous benefits for both children and adults alike. These whimsical creatures serve as tactile tools for stress relief and relaxation, offering a soothing sensory experience that can help alleviate feelings of anxiety and tension. By engaging with the soft, squishy texture of the crochet worms and interacting with their googly eyes, individuals can channel their focus away from stressful thoughts and towards the present moment. The repetitive motion of manipulating the worry worms can promote a sense of calm and mindfulness, allowing individuals to ground themselves in the here and now. Additionally, the playful nature of worry worms makes them an enjoyable and accessible form of self-care, providing moments of levity and joy in the midst of everyday life. Whether squeezed, squished, or simply admired, worry worms offer a gentle reminder to embrace moments of playfulness and find comfort in the simple pleasures of crafting and creativity.
---
To begin, we'll need to create a slip knot and chain five. Once we've completed our chain, we'll go back to the first chain and draw a loop through, followed by a slip stitch through both loops on our hook. This creates a small ring, which will serve as the base for our worry worm. Now, it's time to secure that end by weaving it in, ensuring that we won't have any loose ends to deal with later on. With that done, we'll chain one and begin working within the ring we've just created.

Into the ring, and the googly eyes


we'll work 10 single crochets. The number of single crochets behind the eyes can vary depending on the size and shape of your puppet, but aim for around 8 to 10 stitches. Once we've completed those stitches, we'll work two more single crochets into the ring, again behind the eyes, and then finish off the round with a slip stitch into the first single crochet we made.

Now comes the fun part - creating the body of our worry worm! We'll start by chaining 15, although you can adjust this length to your preference. Each chain will serve as a foundation for three double crochets. To make a double crochet, we'll start with a chain two, then work two double crochets into the third stitch from the hook. We'll repeat this pattern of three double crochets in each chain until we reach the end.

As we work our way along the chain, we'll notice the body of our worry worm starting to take shape, curling gently as we crochet. This curling effect adds a whimsical touch to our creation, giving it character and charm. Once we've completed our last set of double crochets, we'll finish off by cutting the yarn and weaving in the end.

With our worry worm complete, all that's left to do is add a keychain or car decoration to give it some extra flair. Simply thread a loop through the top of the worm's head, and voila - you've got yourself a cute and quirky accessory that's sure to bring a smile to your face.

And there you have it, folks - a delightful worry worm finger puppet that's as fun to make as it is to play with. Be sure to check out our other fidget tutorials for even more crafting inspiration, and don't forget to subscribe to our channel for all the latest updates. Until next time, happy crafting!


Written Instructions for Step-by-Step Hexagon Cardigan Tutorial

How to Crochet Hexi Cardi with Tapered Sleeves


Discover the epitome of boho chic with our free crochet tutorial for creating your own stunning hexagon cardigan. This DIY fashion project offers a unique blend of wearable art and cozy outerwear, perfect for expressing your individual style. With its tapered sleeves and open-front design, this crochet garment exudes handmade charm and versatility. Dive into the world of crochet and embrace the joy of crafting comfort with this captivating hexagon cardigan pattern.

Crochet enthusiasts know that few projects are as versatile and stylish as the hexagon cardigan. Affectionately referred to as the hexi cardi, this garment boasts a unique hexagonal shape and an open-front design that exudes both charm and comfort. Whether you're seeking a lightweight layering option for warmer days or a cozy outerwear piece for cooler weather, the hexi cardi is the epitome of wearable art.


Follow the video tutorial and the written instructions.

The hexagon cardigan is a crochet masterpiece, characterized by its hexagonal shape and relaxed fit. Its versatility lies in its ability to be worn as a stylish layering option in mild weather or as a snug outerwear piece during chillier days. With its tapered sleeves and open-front design, the hexi cardi offers a perfect balance of style and comfort, making it a wardrobe essential for crochet enthusiasts everywhere.

To embark on your hexagon cardigan journey, you'll need some basic crochet supplies, including yarn and a crochet hook. Choose a yarn in your preferred color and weight, considering the desired thickness and texture of your finished garment. Additionally, select a crochet hook size that complements your chosen yarn weight.

The process of creating a hexagon cardigan begins with forming the center hexagon. Using a magic ring technique, crochet clusters of double crochets and chain spaces around the ring, gradually increasing the size of the hexagon with each round. Pay close attention to the corners, where you'll work two clusters to maintain the hexagonal shape. Continue crocheting rounds until the hexagon reaches your desired size.

Once the hexagons for the body of your cardigan are complete, it's time to shape the sleeves. Crochet rows of double crochets, alternating between clusters of three and two double crochets to create a tapered sleeve shape. Adjust the length of the sleeves to your preference, stopping when you've reached the desired size.

With the hexagon pieces and sleeves crocheted, it's time to assemble your cardigan. Join the hexagon pieces together at the shoulders using slip stitches, leaving openings for the arms. Attach the sleeves to the arm openings, ensuring they're evenly spaced and securely stitched in place.

To add the finishing touches to your hexagon cardigan, incorporate a collar and edging along the front and bottom edges. Crochet rows of double crochets for the collar, and finish the edges with slip stitches for a polished look. If desired, add additional rows to the body for added length or adjust the fit as needed.

In conclusion, with your hexagon cardigan complete, you'll have a stylish and cozy garment that's perfect for any occasion. Whether you're lounging at home or out and about, this handmade creation is sure to turn heads and keep you comfortable. So grab your crochet hook and let your creativity flow as you embark on this rewarding crafting journey. Happy crocheting!

Materials Needed

Before we begin crocheting our hexagon cardigan, let's gather our materials:

  1. Worsted weight yarn in your choice of color(s)
  2. Crochet hook (size H/5mm recommended)
  3. Stitch markers
  4. Scissors
  5. Yarn needle

Choose a soft and comfortable yarn that drapes well and feels cozy against the skin. Worsted weight yarn is a great option for this project, as it strikes the perfect balance between warmth and breathability. 

  1. Start with Hexagon Base: Make a ring without the first chain. Draw a loop and pull it through both loops on your hook and the first chain. Hold the tail behind the ring and chain two. Double crochet twice into the ring. These three stitches count as your first granny cluster. Chain one and double crochet three more times into the ring. Repeat this process until you have six groups of three double crochets, separated by chain spaces.

  2. Continue Hexagon Pattern: In each round, work one granny cluster in every space between clusters from the previous round, and work two granny clusters in every corner space. Repeat this pattern until you have the desired width and length for your cardigan.

  3. Joining and Shaping Sleeves: Once you've reached the desired width for the sleeves, stop increasing and begin shaping them. Join the top of the shoulders by slip stitching through the chain and space of the corner. Work rows of granny clusters, alternating between clusters of three double crochets and clusters of two double crochets, until you've reached the desired length for your sleeves.

  4. Elongating the Front, Back, and Bottom: To elongate the front, back, and bottom of the cardigan, add yarn and work back and forth in rows, increasing at the corners until you reach the desired width. Connect the front and back at the shoulders by slip stitching through the corresponding loops.

  5. Adding Collar and Edging: Crochet the collar by working rows of double crochets. Finish the front and bottom edges with a row of half double crochets. Then, add slip stitches around the front and bottom edges for a clean finish.

  6. Final Adjustments: If desired, add more rows to the body for additional length. Make any necessary adjustments for size or style preferences.

That's how you crochet a hexagon cardigan with tapered sleeves. If you have any questions, feel free to ask!